- My Profile
-
R&D Activities
.. System Analysis
.... Digital Photography
.... Stereoscopic Vision
.. HDL Design Flow
-
R&D Resources
.. Search Engines
.. Journals & Magazines
.. Conf. Proceedings
.. Technical Books
-
HOWTO Install
.. coLinux
HOWTO Install Cooperative Linux (coLinux) on Microsoft Windows XP Professional SP2?
NOTICE: This page only relates my experience with the installation of coLinux on my computer. In no way, I suggest or recommend you to proceed in the same way with your computer. Therefore you will receive from me no support on this procedure, no warranty that it works with your computer, no warranty that the software products used in this procedure will not irremediably corrupt or damage your computer.
UPDATE: Since I wrote this page, InnoTek released VirtualBox and VMware released VMware Server & VMware Player at no cost. I downloaded them and came to the conclusion that I will not use coLinux anymore due to the ease-of-use and performance of the free-of-charge InnoTek and VMware solutions. This HOWTO is only there to relate my experience to coLinux hardliners (if there is any).
To make my own opinion I created Ubuntu 6.10 Desktop images for InnoTek and VMware. They are installs of the official Ubuntu 6.10 Desktop distribution with the addition of the "Build-Essential" package and all updates as of 2007/02/23. These images are available below so that you can also make your own opinion about the various virtualization solutions. Note that you will receive no support and no warranty of any kind from me regarding these images.
- Ubuntu 6.10 Desktop Image for InnoTek VirtualBox, Part #01 (PGP Signature) (200MB)
Ubuntu 6.10 Desktop Image for InnoTek VirtualBox, Part #02 (PGP Signature) (200MB)
Ubuntu 6.10 Desktop Image for InnoTek VirtualBox, Part #03 (PGP Signature) (200MB)
Ubuntu 6.10 Desktop Image for InnoTek VirtualBox, Part #04 (PGP Signature) (200MB)
Ubuntu 6.10 Desktop Image for InnoTek VirtualBox, Part #05 (PGP Signature) (43MB)
Login as user "guest", password is "guest". - Ubuntu 6.10 Desktop Image for VMware Server & Player, Part #01 (PGP Signature) (200MB)
Ubuntu 6.10 Desktop Image for VMware Server & Player, Part #02 (PGP Signature) (200MB)
Ubuntu 6.10 Desktop Image for VMware Server & Player, Part #03 (PGP Signature) (200MB)
Ubuntu 6.10 Desktop Image for VMware Server & Player, Part #04 (PGP Signature) (200MB)
Ubuntu 6.10 Desktop Image for VMware Server & Player, Part #05 (PGP Signature) (60MB)
Login as user "guest", password is "guest".
Although the verification process itself may be compromised it is essential that you verify the integrity of the downloaded images using their PGP signatures. This can be done using the PGP program together with my PGP key and the PGP signature of the relevant image.
As a development platform for my PhD research project, I need both Windows for the hardware development flow and Linux for the software one. Before I buy VMware Workstation from WMware, Inc, a popular desktop virtualization software which gives access to Windows and Linux on the same computer at the same time, I decided to give its open-source counterpart Cooperative Linux (coLinux) a chance.
The Linux and the open-source community provide us with great software solutions but, as usual, product documentation is not as great. Consequently, I spent most of the day browsing the Internet and the newsgroups, looking for and collecting the pieces of information that I needed to install coLinux on my computer. Let me tell you about this installation.
- Step 0: Description of the Initial Computer Characteristics
- Step 1: Description of the Initial Network Characteristics
- Step 2: Installation of WinPcap, version 3.1
- Step 3: Installation of Cooperative Linux, version 0.6.2
- Step 4: Installation of VNC Free Edition, version 4.1.1
- Step 5: Configuration of the Network on the Windows Side
- Step 6: Configuration of Cooperative Linux for a Debian Distribution
- Step 7: Configuration of the Network on the Linux Side
- Step 8: Configuration of the Debian Distribution
- Step 9: Enjoy Linux under Windows!
Step 0: Description of the Initial Computer Characteristics (Top)
My computer is a DELL Precision 340 with an Intel Pentium-4 processor running at 2.40GHz, 1.5GB DDR-SDRAM and 120GB Hard-Disk. As operating system, it runs Microsoft Windows XP Pro, version 2002, Service Pack 2 (+ all security and fancy patches on 2005/11/24).
Its 120GB hard-disk is partitioned into two 60GB logical partitions C:\ and D:\. The first one, C:\, is dedicated to the installation of all Windows applications, while the second one, D:\, is dedicated to the storage of all Linux disk images. On both partitions, more than 30GB are free.
Step 1: Description of the Initial Network Characteristics (Top)
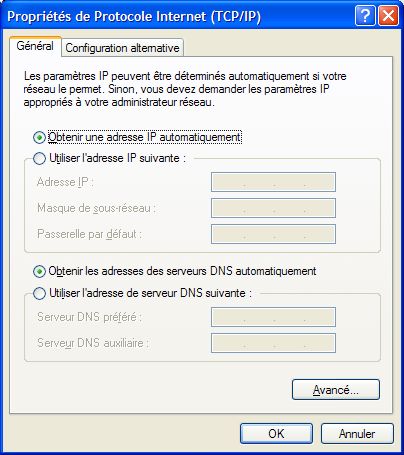
My computer has only one Ethernet interface connected to the local area network of my company (a network with a DHCP server (11.57.16.2), some DNS servers (11.57.16.1 and 11.57.16.3) and a PROXY server (11.1.16.11) for the Internet). The network caracteristics of my computer before I install coLinux are detailled below.
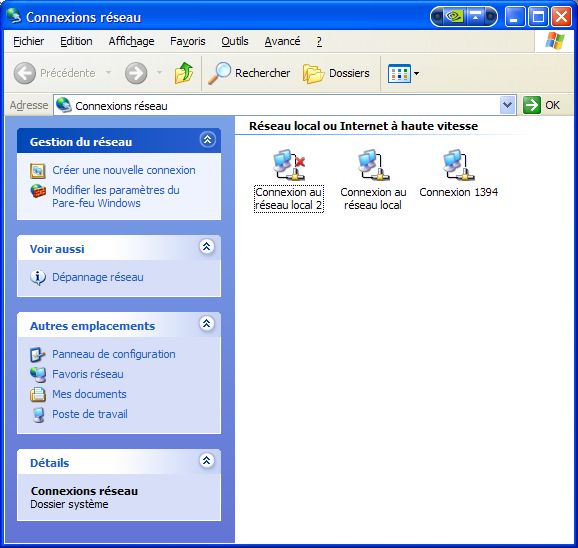
Let's open the configuration panel to see the already installed network connections:

I select (Connexion au réseau local > Propriétés > Général).
I select (Protocole Internet (TCP/IP) > Propriétés > Général).

Let's open a DOS Command Box to verify the network configuration:
REM I type the following commands:
C:\Documents and Settings\edelage>ipconfig /all
Configuration IP de Windows
Nom de l'hôte . . . . . . . . . . : abc
Suffixe DNS principal . . . . . . :
Type de nud. . . . . . . . . . . : Hybride
Routage IP activé . . . . . . . . : Non
Proxy WINS activé . . . . . . . . : Non
Liste de recherche du suffixe DNS : xyz.com
Carte Ethernet Connexion au réseau local:
                    Suffixe DNS propre à la connexion : xyz.com

                    Description . . . . . . . . . . . : Contrôleur Fast Ethernet intégré 3Com 3C920 (compatible 3C905C-TX)

                    Adresse physique. . . . . . . . . : 00-08-74-93-D3-BE

                    DHCP activé . . . . . . . . . . . : Oui

                    Configuration automatique activée . . . . : Oui

                    Adresse IP. . . . . . . . . . . . : 11.57.17.136

                    Masque de sous-réseau . . . . . . : 255.255.240.0

                    Passerelle par défaut . . . . . . : 11.57.16.51

                    Serveur DHCP. . . . . . . . . . . : 11.57.16.2

                    Serveurs DNS. . . . . . . . . . . : 11.57.16.1


                     11.57.16.3

                    Serveur WINS principal. . . . . . : 11.57.16.1

                    Serveur WINS secondaire . . . . . : 11.57.16.3

                    Bail obtenu . . . . . . . . . . . : jeudi 24 novembre 2005 11:30:18

                    Bail expirant . . . . . . . . . . : vendredi 3 mars 2006 11:30:18
Step 2: Installation of WinPcap, version 3.1 (Top)
Because I already know that Cooperative Linux will expect WinPcap to be installed during its installation process, I download WinPcap (version 3.1) from WinPcap.org and install it first. Let's follow its installation process step-by-step:

I click on "Next".
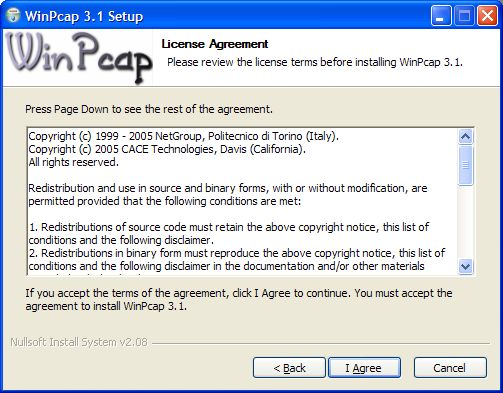
I click on "I Agree".

I click on "Finish".
I restart my computer.
Step 3: Installation of Cooperative Linux, version 0.6.2 (Top)
I download Cooperative Linux (version 0.6.2) from coLinux.org and install it in the "C:\Program Files\coLinux" directory. Let's follow the installation process step-by-step:

I click on "Next".

I click on "I Agree".

I unselect "Root Filesystem Image Download".
I click on "Next".

I enter "C:\Program Files\coLinux".
I click on "Next".

I click on "Next".

I click on "Continuer".

I select "Remember this action".
I click on "Ignore".

I click on "Finish".
I restart my computer.
Step 4: Installation of VNC Free Edition, version 4.1.1 (Top)
I download VNC Free Edition (version 4.1.1) from RealVNC.com and install it in the "C:\Program Files\RealVNC\VNC 4.1.1" directory. This VNC client will be used to connect to the VNC server running KDE under Linux. Let's follow the installation process step-by-step:
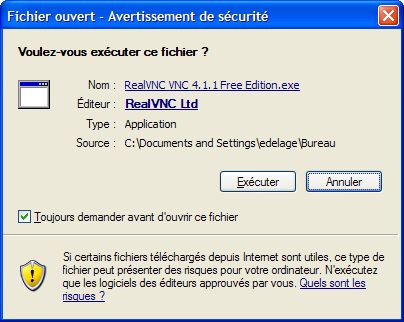
I click on "Exécuter".
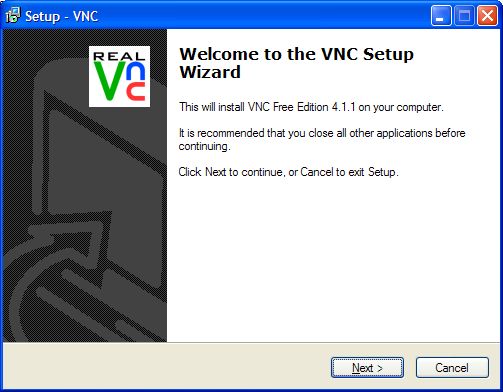
I click on "Next".

I select "I accept the agreement".
I click on "Next".
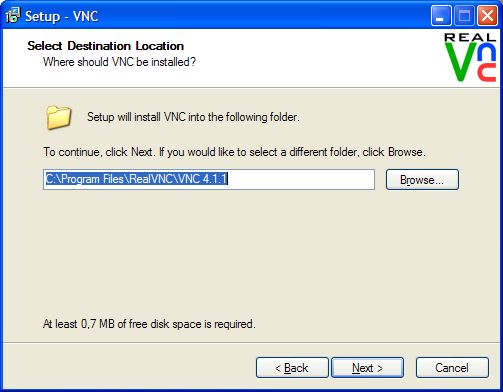
I enter "C:\Program Files\RealVNC\VNC 4.1.1".
I click on "Next".

I unselect "VNC Server".
I select "VNC Viewer".
I click on "Next".

I enter "RealVNC".
I unselect "Don't create a Start Menu folder".
I click on "Next".

I select "Create a VNC Viewer desktop icon".
I select "Create a VNC Viewer quick launch icon".
I click on "Next".
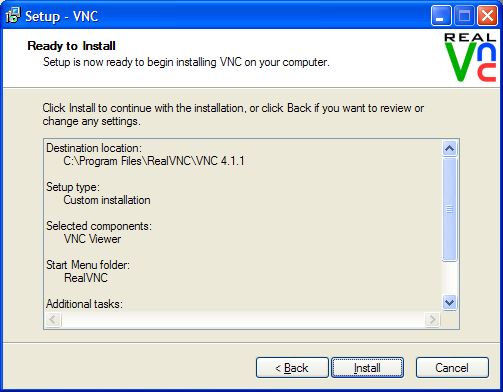
I click on "Install".

I click on "Next".

I click on "Finish".
I restart my computer.
Step 5: Configuration of the Network on the Windows Side (Top)
Let's open the configuration panel to see the newly installed network connections:
I rename "Connexion au réseau local 2" to "Connexion au réseau local (TAP-Win32)".

I select (Connexion au réseau local > Propriétés > Général).
I select (Protocole Internet (TCP/IP) > Propriétés > Général).
I verify that the configuration is unchanged. I click on "OK". I select (Connexion au réseau local > Propriétés > Avancé).

I select "Autoriser d'autres utilisateurs du réseau à se connecter via la connexion Internet de cet ordinateur".
I unselect "Autoriser d'autres utilisateurs du réseau à contrôler ou désactiver la connexion Internet partagée".
I click on "OK".
I select (Connexion au réseau local (TAP-Win32) > Propriétés > Général).
I select (Protocole Internet (TCP/IP) > Propriétés > Général).
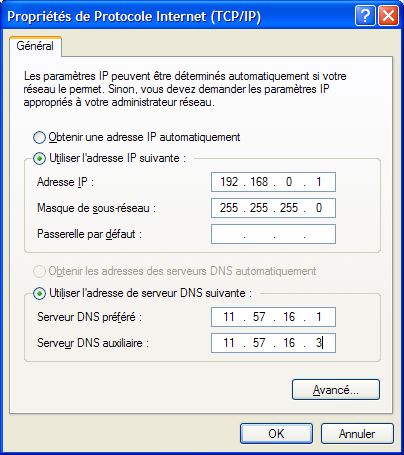
I select "Utiliser l'adresse IP suivante".
I enter "192.168.0.1" in the field "Adresse IP".
I enter "255.255.255.0" in the field "Masque de sous-réseau".
I select "Utiliser l'adresse de serveur DNS suivante".
I enter "11.57.16.1" in the field "Serveur DNS préféré".
I enter "11.57.16.3" in the field "Serveur DNS auxiliaire".
I click on "OK". I restart my computer.
Let's open a DOS Command Box to verify the network configuration:
REM I type the following commands:
C:\Documents and Settings\edelage>ipconfig /all
Configuration IP de Windows
Nom de l'hôte . . . . . . . . . . : abc
Suffixe DNS principal . . . . . . :
Type de nud. . . . . . . . . . . : Hybride
Routage IP activé . . . . . . . . : Oui
Proxy WINS activé . . . . . . . . : Non
Liste de recherche du suffixe DNS : xyz.com
Carte Ethernet Connexion au réseau local:
                    Suffixe DNS propre à la connexion : xyz.com

                    Description . . . . . . . . . . . : Contrôleur Fast Ethernet intégré 3Com 3C920 (compatible 3C905C-TX)

                    Adresse physique. . . . . . . . . : 00-08-74-93-D3-BE

                    DHCP activé . . . . . . . . . . . : Oui

                    Configuration automatique activée . . . . : Oui

                    Adresse IP. . . . . . . . . . . . : 11.57.17.136

                    Masque de sous-réseau . . . . . . : 255.255.240.0

                    Passerelle par défaut . . . . . . : 11.57.16.51

                    Serveur DHCP. . . . . . . . . . . : 11.57.16.2

                    Serveurs DNS. . . . . . . . . . . : 11.57.16.1


                     11.57.16.3

                    Serveur WINS principal. . . . . . : 11.57.16.1

                    Serveur WINS secondaire . . . . . : 11.57.16.3

                    Bail obtenu . . . . . . . . . . . : jeudi 24 novembre 2005 11:30:18

                    Bail expirant . . . . . . . . . . : vendredi 3 mars 2006 11:30:18
Carte Ethernet Connexion au réseau local (TAP-Win32):
                    Statut du média . . . . . . . . . : Média déconnecté

                    Description . . . . . . . . . . . : TAP-Win32 Adapter V8 (coLinux)

                    Adresse physique. . . . . . . . . : 00-FF-55-AB-B6-F5
Let's configure Microsoft Windows firewall:
I select (Pare-feu Windows > Général).

I select "Activé".
I select (Pare-feu Windows > Avancé).

I unselect "Connexion au réseau local (TAP-Win32).
I click on "OK"
Step 6: Configuration of Cooperative Linux for a Debian Distribution (Top)
I download the debian distribution called Debian-3.0r2.ext3-mit-backports.1gb.bz2 from Sourceforge.net. It is pre-installed in a compressed disk image that I just uncompress in the "D:\XYZ.edelage" directory and rename to "D:\XYZ.edelage\coLinux.distribution.debian-3.0r2.ext3-mit-backports.1gb.img"
# I type the following commands:
edelage@abc ~
$ cd D:
edelage@abc /cygdrive/d
$ cd XYZ.edelage/
edelage@abc /cygdrive/d/XYZ.edelage
$ dd if=/dev/zero of=coLinux.swap-file.img count=2097152
2097152+0 records in
2097152+0 records out
edelage@abc /cygdrive/d/XYZ.edelage
$ dd if=/dev/zero of=coLinux.file-system.home.edelage.img count=16777216
16777216+0 records in
16777216+0 records out
edelage@abc /cygdrive/d/XYZ.edelage
$ dd if=/dev/zero of=coLinux.file-system.root.img count=16777216
16777216+0 records in
16777216+0 records out
edelage@abc /cygdrive/d/XYZ.edelage
$ ls
coLinux.distribution.debian-3.0r2.ext3-mit-backports.1gb.img
coLinux.file-system.home.edelage.img
coLinux.file-system.root.img
coLinux.swap-file.img
I edit "C:\Program Files\coLinux\default.colinux.xml":
                <?xml version="1.0" encoding="UTF-8"?>

                <colinux>


                    <block_device


                        index="0"

                        path="\DosDevices\D:\XYZ.edelage\coLinux.distribution.debian-3.0r2.ext3-mit-backports.1gb.img"

                        enabled="true" />


                    <block_device


                        index="1"

                        path="\DosDevices\D:\XYZ.edelage\coLinux.swap-file.img"

                        enabled="true" />


                    <block_device


                        index="2"

                        path="\DosDevices\D:\XYZ.edelage\coLinux.file-system.home.edelage.img"

                        enabled="true" />


                    <block_device


                        index="3"

                        path="\DosDevices\D:\XYZ.edelage\coLinux.file-system.root.img"

                        enabled="true" />


                    <bootparams>root=/dev/cobd0</bootparams>

                    <initrd path="initrd.gz" />

                    <image path="vmlinux" />

                    <memory size="256" />

                    <network index="0" type="tap" />


                </colinux>
Let's open a DOS Command Box to start coLinux:
REM I type the following commands:
C:\Documents and Settings\edelage>cd "C:\Program Files\coLinux"
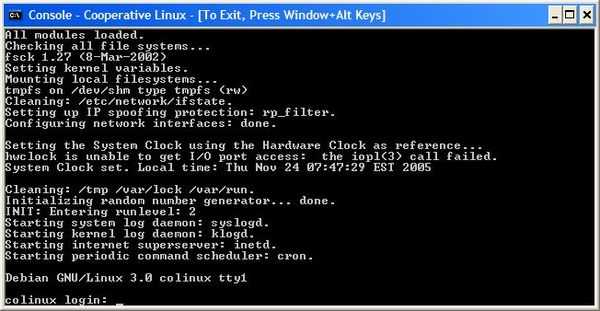
C:\Program Files\coLinux>colinux-daemon.exe -c default.colinux.xml -t nt
Here is Linux/Debian running in text mode under Windows XP:
Step 7: Configuration of the Network on the Linux Side (Top)
Let's use the Linux shell:
# I type the following commands:
colinux login: root
Password: root
colinux:~# dpkg-reconfigure console-data
# With the basic graphical interface:
# I select "Select keymap from arch list".
# I select "AZERTY".
# I select "French".
# I select "With Euro (latin 15)".
colinux:~# nano /etc/network/interfaces
I edit "/etc/network/interfaces":
                # /etc/network/interfaces -- configuration file for ifup(8), ifdown(8)


                # The loopback interface

                auto lo

                iface lo inet loopback


                # The first network card - this entry was created during the Debian installation

                # (network, broadcast and gateway are optional)

                auto eth0

                iface eth0 inet static


                    address 192.168.0.40

                    netmask 255.255.255.0

                    gateway 192.168.0.1
The network interface is now configured.
Let's use the Linux shell:
# I type the following commands:
colinux:~# nano /etc/resolv.conf
I edit "/etc/resolv.conf":
nameserver 192.168.0.1
The network DNS server is now configured.
Let's use the Linux shell:
# I type the following commands:
colinux:~# ping -c 1 abc
PING abc (192.168.0.1): 56 data bytes
64 bytes from 192.168.0.1: icmp_seq=0 ttl=128 time=5.3 ms
--- abc ping statistics ---
1 packets transmitted, 1 packets received, 0% packet loss
round-trip min/avg/max = 5.3/5.3/5.3 ms
colinux:~# nano /etc/apt/apt.conf
I edit "/etc/apt/apt.conf":
                Acquire::http::Proxy "http://MYDOMAINNAME\\edelage:MYPASSWORD@11.1.16.11:8080"

                Acquire::ftp::Proxy "http://MYDOMAINNAME\\edelage:MYPASSWORD@11.1.16.11:8080"
The network PROXY server is now configured.
Step 8: Configuration of the Debian Distribution (Top)
Let's use the Linux shell:
# I type the following commands:
colinux:~# mkswap /dev/cobd1
Setting up swapspace version 1, size = 1073737728 bytes
colinux:~# nano /etc/fstab
I edit "/etc/fstab":
                # /etc/fstab: static file system information.

                #

                # <file system> <mount point> <type> <options> <dump> <pass>

                /dev/cobd0 / ext3 errors=remount-ro 0 1

                proc /proc proc defaults 0 0

                tmpfs /dev/shm tmpfs defaults 0 0

                /dev/cobd1 swap swap defaults 0 0
The swap file is now configured.
Let's use the Linux shell:
# I type the following commands:
colinux:~# swapon -a
Adding 1048568k swap on /dev/cobd1. Priority:-1 extents:1
colinux:~# mkfs.ext3 /dev/cobd3
colinux:~# mkdir /mnt/test
colinux:~# mount /dev/cobd3 /mnt/test
colinux:~# cp -ax / /mnt/test
colinux:~# umount /mnt/test
colinux:~# shutdown -h now
The swap file is now mounted and enabled.
The root filesystem is now moved to the "D:\XYZ.edelage\coLinux.file-system.root.img" disk image.
I remove the "D:\XYZ.edelage\coLinux.distribution.debian-3.0r2.ext3-mit-backports.1gb.img" disk image.
Let's go back to Windows:
I edit "C:\Program Files\coLinux\default.colinux.xml".
                <?xml version="1.0" encoding="UTF-8"?>

                <colinux>


                    <block_device


                        index="0"

                        path="\DosDevices\D:\XYZ.edelage\coLinux.file-system.root.img"

                        enabled="true" />


                    <block_device


                        index="1"

                        path="\DosDevices\D:\XYZ.edelage\coLinux.swap-file.img"

                        enabled="true" />


                    <block_device


                        index="2"

                        path="\DosDevices\D:\XYZ.edelage\coLinux.file-system.home.edelage.img"

                        enabled="true" />


                    <bootparams>root=/dev/cobd0</bootparams>

                    <initrd path="initrd.gz" />

                    <image path="vmlinux" />

                    <memory size="256" />

                    <network index="0" type="tap" />


                </colinux>
Let's open a DOS Command Box to restart coLinux:
REM I type the following commands:
C:\Documents and Settings\edelage>cd "C:\Program Files\coLinux"
C:\Program Files\coLinux>colinux-daemon.exe -c default.colinux.xml -t nt
Let's use the Linux shell:
# I type the following commands:
colinux login: root
Password: root
colinux:~# apt-get update
# With the basic text interface:
# Do yo want to continue? I answer Y.
colinux:~# apt-get install base-config
# With the basic text interface:
# Do yo want to continue? I answer Y.
# I select NonInteractive.
# I select Medium.
# Do you want to upgrade glibc now? I answer Y.
# Do you wish to restart services? I answer Y.
colinux:~# apt-get install x-window-system-core
# With the basic text interface:
# Do yo want to continue? I answer Y.
colinux:~# apt-get install kde
# With the basic text interface:
# Do yo want to continue? I answer Y.
colinux:~# apt-get install vncserver
# With the basic text interface:
# Do yo want to continue? I answer Y.
colinux:~# mkdir /root/.vnc
colinux:~# nano /root/.vnc/xstartup
I edit "/root/.vnc/xstartup":
                #!/bin/sh

                startkde &
XFree and KDE are now installed.
The VNC server is now configured.
Let's use the Linux shell:
# I type the following commands:
colinux:~# vncserver :1 -geometry 1024x768 -depth 24
# I enter "mypassword".
Let's go back to Windows:

I enter "192.168.0.40:1".
I click on "Options".
I select (Colour & Encoding).
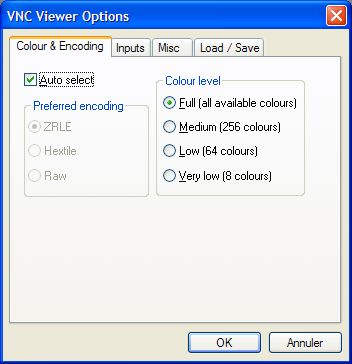
I select "Auto-select".
I select "Full (all available colours)" in "Colour level".
I select (Load / Save).
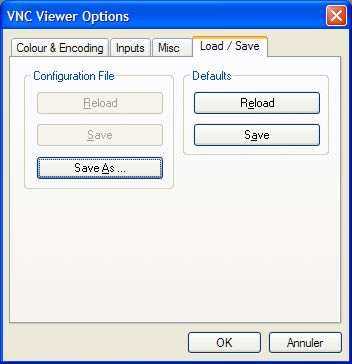
I click on "Save" in "Defaults".
I click on "OK".
I click on "OK".

I enter "mypassword" in "Password".
I click on "OK".
Step 9: Enjoy Linux under Windows! (Top)
Here is Linux/Debian/KDE running in graphics mode under Windows XP:

Click on the screenshot to enlarge it.